


You want to make smarter decisions and boost your online success, right? Setting up analytics dashboards that combine GA4 and Facebook Pixel can give you the clear insights you need to track your audience, measure campaigns, and optimize results.
But getting these tools to work together might feel complicated. Don’t worry—this guide will walk you through the exact steps to create powerful, easy-to-read dashboards that put your data to work. Keep reading to unlock the secrets of seamless tracking and turn your website and ad data into real growth.
Credit: wordpress.org
Setting up a GA4 property is the first step in tracking your website’s performance. This setup allows you to collect accurate data from your site and link it with tools like the Facebook Pixel. A well-configured GA4 property gives you clear insights into user behavior. It helps you make smart decisions based on real data. Follow these simple steps to create and configure your GA4 property for effective analytics tracking.
Log in to your Google Analytics account. In the Admin panel, click on “Create Property.” Enter your website’s name for easy identification. Choose “GA4” as the property type. Click “Next” to proceed. Provide your business details if asked. Finally, click “Create” to set up the new GA4 property. Your property is now ready to collect data.
After creating the property, add a data stream to track your website. Select “Web” as the platform for your site. Enter your website URL and name the stream. Enable enhanced measurement to track page views and events automatically. Save the stream to start collecting data. This step connects your website with GA4 for real-time analytics.
Set the correct time zone to match your business location. This setting ensures accurate reporting of user activity times. Next, choose the currency used for your sales and transactions. The right currency helps in clear revenue tracking. Save these settings to complete your GA4 property setup. Accurate time zone and currency improve your data’s reliability.
Facebook Pixel is a tool that helps track user actions on your website. It collects data to improve your Facebook ads. Setting up the Pixel correctly is important for accurate tracking. This section explains the basics of Facebook Pixel and how to get started.
First, log into your Facebook Business Manager account. Navigate to Events Manager and select Pixels. Click on “Create a Pixel” and name it clearly for your business. Facebook will then generate a unique Pixel code. Copy this code carefully for the next steps.
Open your website’s backend or content management system. Paste the Pixel code into the header section of your website. This places the Pixel on every page to track user visits. Save your changes and publish your website updates.
Use the Facebook Pixel Helper browser extension to check activation. Visit your website and look for a green checkmark on the extension icon. This confirms the Pixel is working properly. If there is no checkmark, review your installation steps again.
Integrating Google Tag Manager (GTM) simplifies managing analytics tools like GA4 and Facebook Pixel. GTM allows adding and controlling tags without changing website code directly. This makes tracking user behavior easier and more flexible. Setting up Facebook Pixel inside GTM ensures accurate data collection for ad optimization and audience insights.
First, open your Google Tag Manager account. Click on “Tags” and select “New.” Choose “Tag Configuration” and pick “Custom HTML.” Paste your Facebook Pixel base code here. Name the tag clearly, like “Facebook Pixel Base.” This tag loads the pixel on all pages.
Next, set a trigger to fire the Facebook Pixel tag. Use the “All Pages” trigger to track every page view. You can create more triggers for specific events like clicks or form submissions. Enable built-in variables in GTM for better tracking control. Variables help capture dynamic data for event parameters.
After setting tags and triggers, click “Submit” in GTM. Add a version name and description for easy reference. Publish the container to apply changes live on your site. Check the Facebook Pixel Helper tool to confirm the pixel fires correctly. This ensures data flows smoothly to your Facebook Ads Manager.
Linking Google Analytics 4 (GA4) with the Facebook Pixel helps gather detailed insights. This connection allows you to track user behavior across platforms. It improves your marketing efforts by combining data from both tools. Setting up this link is simple and effective for better analytics dashboards.
Start by accessing the Facebook Events Manager. Find the Partner Integrations section to connect with GA4. This tool simplifies the process by linking accounts automatically. It saves time and reduces manual errors during setup.
Next, log in to both your Google Analytics and Facebook accounts. Confirm permissions to share data between platforms. Authentication ensures secure access and proper data flow. Without this step, the connection cannot work correctly.
After authentication, match your GA4 properties with Facebook Pixels. This mapping links specific data streams to the right pixel IDs. It helps track events and conversions accurately. Proper mapping is key to reliable cross-platform reporting.
Setting up tracking events is crucial for understanding user actions on your website. It helps you measure how visitors interact with your content. Proper event tracking allows you to gather valuable data for both Google Analytics 4 (GA4) and Facebook Pixel.
This setup involves configuring standard events, creating custom events, and defining event parameters. Each step improves your ability to analyze user behavior and optimize your marketing efforts.
Standard events are predefined actions recognized by GA4 and Facebook Pixel. Examples include page views, purchases, and sign-ups. Configuring these events is simple and ensures consistent data collection across platforms. Use the default event names to keep reporting clear and accurate.
Set up standard events through Google Tag Manager or directly in the analytics dashboard. Verify each event triggers correctly by testing in real time. This builds a solid foundation for your tracking system.
Custom events track specific user actions not covered by standard events. Examples include button clicks, video plays, or form submissions. Create these events to capture unique interactions important to your business.
Define custom events with clear, descriptive names. Use Google Tag Manager to deploy custom tags and triggers. Test each custom event to confirm it fires as expected. Custom events add depth to your data and reveal user engagement details.
Event parameters provide extra information about each event. For example, a purchase event can include parameters like item name, price, and quantity. These details help you analyze event context and user preferences.
Choose relevant parameters for every event type. Use consistent naming and value formats to avoid confusion. Pass these parameters through your tags in Google Tag Manager. Proper parameter setup enhances your reporting and supports better decision-making.
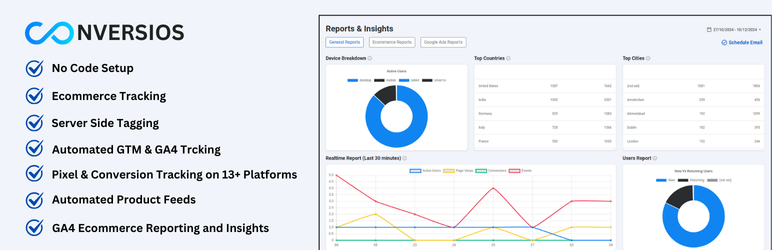
Creating dashboards in Google Analytics 4 (GA4) helps track your website and Facebook Pixel data in one place. Dashboards show important metrics clearly. They simplify data analysis and improve decision-making. Setting up a dashboard in GA4 gives you quick access to key insights.
GA4 lets you customize reports to fit your needs. Choose the data that matters most to your business. Rename reports for easy identification. Adjust the layout to highlight critical information. Custom reports save time and focus on relevant data.
Select metrics that track your goals effectively. Include user engagement, conversion rates, and event data from Facebook Pixel. Combine GA4 data with Facebook Pixel events for deeper analysis. Adding the right metrics helps monitor campaign performance accurately.
Explorations in GA4 offer advanced ways to analyze data. Use them to discover patterns and trends. Create segments and funnels for detailed user behavior study. Explorations reveal insights beyond standard reports. They help understand how Facebook Pixel impacts your results.
Looker Studio Dashboards provide a clear way to view your analytics data. They combine Google Analytics 4 (GA4) and Facebook Pixel data in one place. This helps you track website performance and ad campaigns easily. Using Looker Studio, you can create custom reports that fit your business needs. The dashboards update automatically, so you get fresh data every time you check.
Start by linking your GA4 account with Looker Studio. Then, add Facebook Pixel data as a separate source. Use the Facebook Ads API or export data via CSV. This lets you see both GA4 and Facebook metrics side by side. Make sure to authenticate both accounts for smooth data flow. Proper connection helps you track user actions across platforms.
Create easy-to-read charts and graphs to show your data. Use bar charts for user sessions and line charts for conversions. Add filters to compare date ranges or campaigns. Choose colors that make data stand out without clutter. Keep the layout simple and focused on key metrics. Visual reports help you spot trends and make decisions fast.
Set your dashboard to refresh data regularly. Looker Studio allows scheduling daily or weekly updates. This keeps your reports current without manual work. Automatic updates save time and reduce errors. You can also share dashboards with your team for real-time insights. Scheduled updates make tracking progress easier and more reliable.
Credit: www.tmedia.cl
Setting up analytics dashboards with GA4 and Facebook Pixel can be tricky. Errors may occur during setup. Troubleshooting helps fix these problems quickly. This section covers key tips to ensure your data tracks correctly.
Incorrect tracking codes cause most problems. Double-check the GA4 measurement ID and Facebook Pixel ID. Missing or duplicated tags lead to data gaps or errors. Ensure tags are placed in the right website sections. Conflicts with other scripts can block tags. Clear caches and test again after changes.
Use browser tools to debug pixels and tags. Facebook Pixel Helper shows if the pixel fires correctly. Google Tag Assistant helps verify GA4 tags. Look for errors or warnings in these tools. Test events by triggering user actions on your site. Confirm that events appear in real-time reports.
Check data consistency between GA4 and Facebook reports. Compare user counts and conversions on both platforms. Small differences are normal due to tracking methods. Large gaps suggest setup or filtering problems. Review event parameters for accuracy. Regularly audit your data to maintain trustworthiness.
Optimization strategies improve the performance of your analytics dashboards. They ensure accurate data collection and better insights. Proper optimization helps you make smart marketing decisions and boost campaign results.
Check your data sources regularly for errors. Use filters to remove spam and irrelevant traffic. Verify that tracking codes are correctly installed on all pages. Clean data leads to reliable reports and better analysis.
Set up custom events that match your business goals. Track user actions like button clicks, form submissions, or video views. Use clear naming conventions for events to avoid confusion. Detailed event tracking gives deeper insights into user behavior.
Use the Conversion API to send data directly from your server to Facebook. This reduces data loss caused by browser restrictions or ad blockers. The API improves data accuracy and ad targeting. Implementing it strengthens your tracking and reporting capabilities.
Credit: optinmonster.com
Connect Meta Pixel to GA4 by adding Meta Pixel via Google Tag Manager. Link GA4 and Meta accounts in Events Manager under Partner Integrations. Configure events in GTM and verify tracking in both platforms for accurate data syncing.
Open Google Analytics 4, go to “Explore,” and click “Blank” to start a new dashboard. Add dimensions and metrics, then customize charts and filters. Save and share your dashboard for easy data analysis.
Sign in to Google Analytics, go to Admin, click Create Property, enter property details, then create a data stream for your website or app.
Go to Facebook Events Manager > Partner Integrations > Google Analytics. Authenticate, select accounts, and connect your Pixel to GA. Use Google Tag Manager to add the Pixel code for tracking.
Setting up GA4 and Facebook Pixel dashboards helps track your website’s performance clearly. These tools collect data to understand visitors and ad results better. Connecting them ensures you see all key metrics in one place. This makes it easier to adjust marketing strategies quickly.
Regularly check your dashboards to find trends and improve results. Simple, organized data leads to smarter decisions and stronger online presence. Start with clear steps, and your analytics will guide your business growth well.


Leave A Reply Now