


You want your videos to look and sound professional without breaking the bank. But how do you choose the right camera, microphone, and lighting setup when there are so many options out there?
This guide is made just for you—the budget creator who wants quality gear that won’t empty your wallet. By the end, you’ll know exactly what affordable equipment to pick and how to use it, so your content shines and your audience stays hooked.
Ready to upgrade your setup and create videos that truly stand out? Let’s dive in!
Choosing the right camera is crucial for budget creators. The camera captures your vision and sets video quality. Many options exist, each with benefits and limits. Knowing these helps pick the best fit for your needs.
Focus on cameras that offer good quality without high prices. Balance ease of use and features. This guide covers affordable cameras, compares smartphones and DSLRs, and explains lens choices.
Beginner cameras often cost less but deliver solid video quality. Brands like Canon, Nikon, and Sony offer budget models under $500. These cameras feature easy controls and good autofocus. Compact mirrorless cameras are light and versatile. Look for options with microphone ports for better audio.
Used or refurbished cameras can save money and still work well. Check online reviews and seller ratings before buying. Prioritize cameras with good battery life and video resolution of at least 1080p.
Smartphones offer convenience and decent video quality. Most recent models shoot in 4K and have built-in stabilization. They are perfect for creators starting out with no extra gear. Use accessories like tripods and external mics to improve results.
DSLRs provide better image quality and lens options. They perform well in low light and allow manual control. DSLRs create a professional look with shallow depth of field. They need more setup but offer more creative freedom.
Choose smartphones for ease and portability. Pick DSLRs for higher quality and flexibility.
Lenses affect how your video looks and feels. A wide-angle lens captures more background and works well for vlogging. A standard 18-55mm lens is versatile for most scenes. Prime lenses like 50mm offer sharper images and better low-light performance.
Consider lenses with image stabilization to reduce shake. Zoom lenses give flexibility but can be heavier and costly. Fixed lenses often have better image quality. Match the lens to your camera’s mount and your shooting style.
Simple lenses can create great videos without extra cost. Experiment to see which lens suits your content best.
Choosing the right microphone is key for clear and professional audio. Good sound makes your videos more engaging. Budget creators can pick from several mic types. Each fits different needs and recording situations. Understanding their features helps you decide what suits your setup best.
Lavalier microphones are small and clip on your clothing. They capture clear sound close to your mouth. This reduces background noise and echoes. Perfect for interviews, vlogs, and talking directly to the camera. Lavalier mics are affordable and easy to use. They let you move freely without losing sound quality.
Shotgun microphones focus on sound from one direction. They block noise from the sides and back. Ideal for outdoor shoots or busy places. Shotgun mics can be mounted on your camera or a boom pole. They pick up natural, high-quality audio. This mic type works well for narrations and group recordings.
USB microphones connect directly to your computer. No extra gear or complicated wiring needed. Great for beginners and those recording at a desk. USB mics deliver good sound for podcasts and voiceovers. Many models come with built-in controls for volume and mute. They offer a simple way to improve your audio instantly.
Good lighting makes your videos look clear and professional. It shows your face and products in the best way. Bright and soft light reduces shadows and makes colors true. Learning the basics of lighting helps you improve your videos without spending too much.
Natural light is free and easy to use. Shoot near windows during the day for soft, even light. Avoid direct sunlight to stop harsh shadows and bright spots. Use white curtains to diffuse light and make it softer. Turn off indoor lights to keep the color natural and balanced.
Softbox kits create smooth, even lighting for your videos. They spread light over a large area to reduce shadows. These kits are affordable and simple to set up. Place softboxes at 45-degree angles from your face to get good coverage. Use daylight bulbs in softboxes to keep colors natural and true.
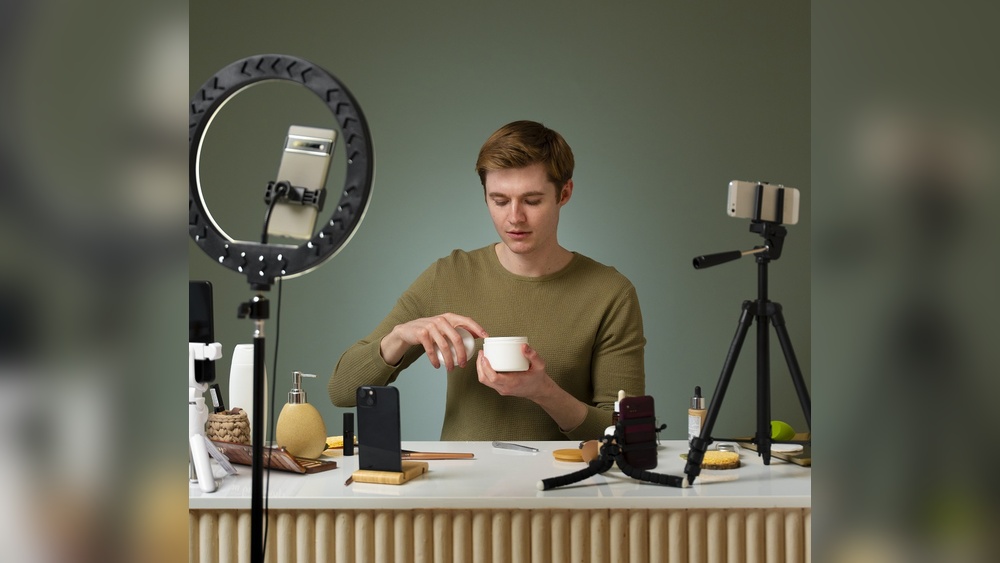
Ring lights give bright, even light with a nice catchlight in your eyes. They are compact and easy to use for close-up shots. Position the ring light around your camera or phone for balanced light on your face. Many ring lights offer adjustable brightness and color temperature. Choose a ring light with a tripod for stable setup and hands-free filming.
Good lighting can make your videos look professional without costing much. Budget lighting hacks help creators improve light quality on a tight budget. Simple tricks and smart use of materials brighten your shots and reduce harsh shadows.
With a few household items and affordable tools, you can soften light and create a pleasing look. These tips save money and still deliver great results for your camera setup.
Use white bedsheets or parchment paper as light diffusers. Place them between your light source and subject to soften harsh light. This creates a smooth, even glow that reduces shadows.
Reflectors bounce light back onto your subject, filling dark areas. Use a white poster board or aluminum foil-covered cardboard as a reflector. Position reflectors opposite your light to balance the lighting.
Household items can serve many lighting needs. A white shower curtain or thin white fabric works well as a diffuser. Clip or tape it in front of lamps or windows.
Mirrors and foil trays reflect light to brighten your scene. Even a white wall can act as a natural reflector. Experiment with angles to find the best light bounce.
Purchase inexpensive softboxes or clip-on LED lights online. These come with built-in diffusers that enhance light quality. LED panels often have adjustable brightness and color temperature.
Use inexpensive clamps, stands, or tripods to hold lights steady. Light modifiers like umbrellas or grids are available at low cost and improve control. Small investments in these tools upgrade your lighting setup effectively.
Tripods and mounts form the backbone of any camera setup. They keep your device steady and allow hands-free shooting. This setup improves video quality by reducing shake and jitter. Budget creators can find many affordable options. These tools fit various devices, from cameras to smartphones. Proper support makes filming easier and more professional.
Stable tripods provide firm support for cameras. Look for tripods with adjustable legs and secure locks. Aluminum tripods offer a good balance of weight and strength. Compact tripods fit into small spaces and travel bags. Stability helps capture sharp images and smooth videos. Choose one that suits your camera size and weight.
Smartphone mounts add versatility to your setup. They hold your phone steady for vlogging or streaming. Flexible mounts bend and twist to find the best angle. Some mounts attach to desks, tripods, or even handlebars. These mounts are lightweight and easy to adjust. They help create professional-looking content without extra gear.
Gimbals stabilize your camera or smartphone during movement. They reduce shakiness while walking or panning shots. Affordable gimbals come with simple controls and rechargeable batteries. These devices improve video smoothness without high costs. Compact models fit in bags and are easy to carry. Budget creators gain better motion shots with gimbals.
Good audio can make or break your video content. Clear sound keeps viewers interested and helps them understand your message. This section shares simple tips to improve your audio setup without spending much.
Background noise distracts your audience. Turn off fans, air conditioners, and other noisy devices. Close windows and doors to block outside sounds. Use soft materials like blankets or pillows to absorb echoes. This creates a cleaner sound for your recordings.
Place your microphone close to your mouth but out of the camera’s view. Position it slightly to the side or below your chin. Avoid touching or moving the mic during recording. This reduces unwanted noise and captures your voice clearly.
Choose a quiet room with minimal hard surfaces. Rooms with carpets, curtains, and furniture help reduce echo. Turn off noisy electronics before recording. Try recording at times when your surroundings are the quietest. Small changes in your environment improve sound quality greatly.
Combining your camera, microphone, and lighting gear effectively can raise your video quality without raising costs. Smart pairing of these tools ensures clear visuals and crisp sound, giving your content a professional edge. Focus on how each element works together for smooth, engaging videos that grab attention.
Your camera and microphone must complement each other. A high-quality camera needs clear sound to match the visuals. Use a microphone that suits your shooting environment. For quiet spaces, a condenser mic works well. For outdoor or noisy spots, a shotgun mic blocks background noise. Adjust your camera settings to match your mic’s capabilities. This balance keeps viewers focused on your message.
Good lighting affects audio quality too. Avoid harsh lights that cause buzzing or interference. Softbox lights or ring lights provide even lighting without noise. Position lights to reduce shadows and glare on the microphone. Keep cables tidy to prevent audio disturbances. Testing your setup before recording helps catch issues early. This sync enhances both image and sound clarity.
Space and budget often limit creators. Choose gear that fits your workspace and budget. A compact camera with a built-in mic and a small LED light can work well. Use a portable tripod to keep your setup stable. Lavalier mics are great for hands-free audio without clutter. Pack your gear in a lightweight bag for easy transport. Small setups still deliver big results when combined smartly.

Credit: www.heightsplatform.com
Budget creators need reliable gear without high prices. Finding the right camera, microphone, and lighting setup can be tricky. Top budget kits combine essential tools in one package. These kits save money and simplify the buying process. They offer good quality for beginners and hobbyists.
Pre-packaged vlogging kits include a camera, mic, and lights. These kits are ready to use out of the box. They often come with a tripod and carrying case. Brands focus on ease and compact design. Ideal for creators who want quick setup and mobility. Prices usually range from low to mid-budget. These kits help improve video and sound quality instantly.
Studio starter packs offer more control over lighting and sound. These kits often include softbox lights or ring lights. Microphones tend to be shotgun or lavalier types. Cameras in these packs usually support higher resolution. Perfect for creators setting up a home studio. These kits provide better image clarity and sound capture. They suit users aiming for professional-looking videos without big expenses.
Online stores offer bundles that mix and match gear for savings. These bundles may include extra batteries, memory cards, or stands. Prices are competitive due to online discounts and sales. Buyers can find kits tailored to smartphones or DSLRs. Customer reviews help pick the best value options. These bundles are smart choices for creators on a strict budget. They balance cost and quality for effective content creation.
Proper maintenance and timely upgrades keep your camera, microphone, and lighting setup working well. This approach helps budget creators avoid frequent replacements. A well-kept setup delivers better video and sound quality. Small efforts extend the life of your gear and improve your content.
Clean lenses and microphone grills regularly using a soft cloth. Avoid harsh chemicals that may damage the surfaces. Store your equipment in dry, dust-free places to prevent damage. Use lens caps and covers to protect sensitive parts. Check cables and connectors for wear or dirt often. Handle your gear gently to avoid drops and impacts.
Upgrade when your gear no longer meets your needs or breaks down. Consider new equipment if video or audio quality drops noticeably. Software updates can sometimes improve performance without new gear. Watch for better lighting options that fit your shooting style. Balance cost with the value new gear adds to your content. Avoid upgrading too soon to save money.
Use protective cases while traveling to avoid damage. Regularly check and tighten loose screws or mounts. Keep batteries charged but avoid overcharging to preserve battery health. Rotate your equipment use to reduce wear on a single item. Learn simple repairs to fix minor problems yourself. Proper care helps you get more from every dollar spent.
Credit: www.learnworlds.com
.webp)
Credit: riverside.com
Affordable cameras like the Canon M50 or Sony ZV-1 offer great quality. They are user-friendly and suitable for various content types. These options balance price and performance, ideal for budget-conscious creators starting out.
Invest in a lavalier or shotgun microphone under $50. These mics significantly enhance sound clarity over built-in options. Proper placement near the audio source also reduces background noise.
Use softbox or ring lights priced between $30-$100 for even, flattering light. Natural light combined with affordable LED panels can also enhance video quality. Avoid harsh shadows for professional-looking footage.
Yes, a sturdy tripod is essential for steady shots and professional framing. Budget tripods under $30 work well for most cameras. They prevent shaky footage and free your hands for better control.
Good audio and lighting improve your video quality greatly. A simple camera, a decent microphone, and soft lighting work well. Budget setups do not need to be complicated or costly. Focus on clear sound and even light to engage viewers.
Small upgrades can make a big difference over time. Practice using your gear to create better content. Start with what you have, then improve step-by-step. Consistency and effort matter more than expensive tools. Keep creating and learning, and your skills will grow.


Leave A Reply Now